How to Customize Your Templates With Canva
Templates are incredible time-savers for busy small business owners, but the magic happens when you transform them from generic designs into branded assets that truly represent your business + brand. This guide will walk you through the process of customizing your templates using Canva—a user-friendly design tool that makes personalization accessible even if you don't have design experience.
Whether you're working with your own graphics or email templates from the Email Clubhouse membership library, these step-by-step instructions will help you create cohesive, professional-looking designs that strengthen your brand identity.
What You'll Need
Before diving into customization, make sure you have:
-
A Canva account (the free version works for most basic customizations, including all Email Clubhouse templates, though Canva Pro offers additional features)
-
Your brand elements ready (logo, color hex codes, preferred fonts)
-
The templates from your Email Clubhouse membership (optional)
Getting Started With Canva
If you're new to Canva, getting set up is straightforward. Head to Canva.com and either log in or create a free account. Once you're in, you'll see a dashboard with various design options.
To work with one of our templates:
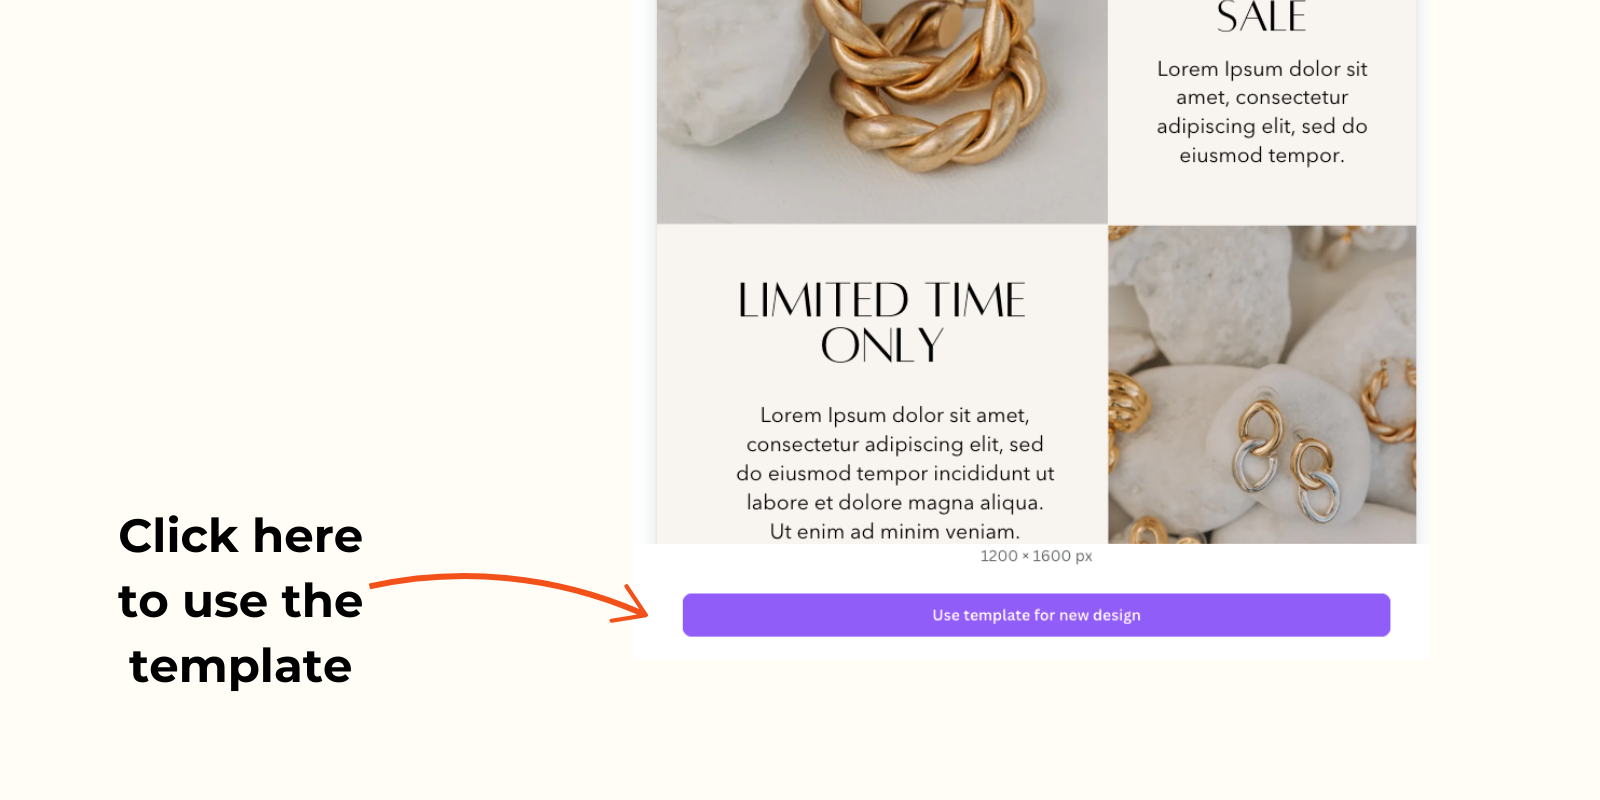
-
Access the template from the membership area
-
In Canva, click the "Use template for new design"
-
A copy of the template will automatically be created in your Canva account
-
You can rename the design and begin customizing
The Canva editor has an intuitive interface with your canvas in the center, editing tools on the top bar, and elements, uploads, and other options in the left sidebar.
Step 1: Updating Your Brand Colors
Colors play a crucial role in brand recognition. Here's how to infuse your templates with your brand colors:
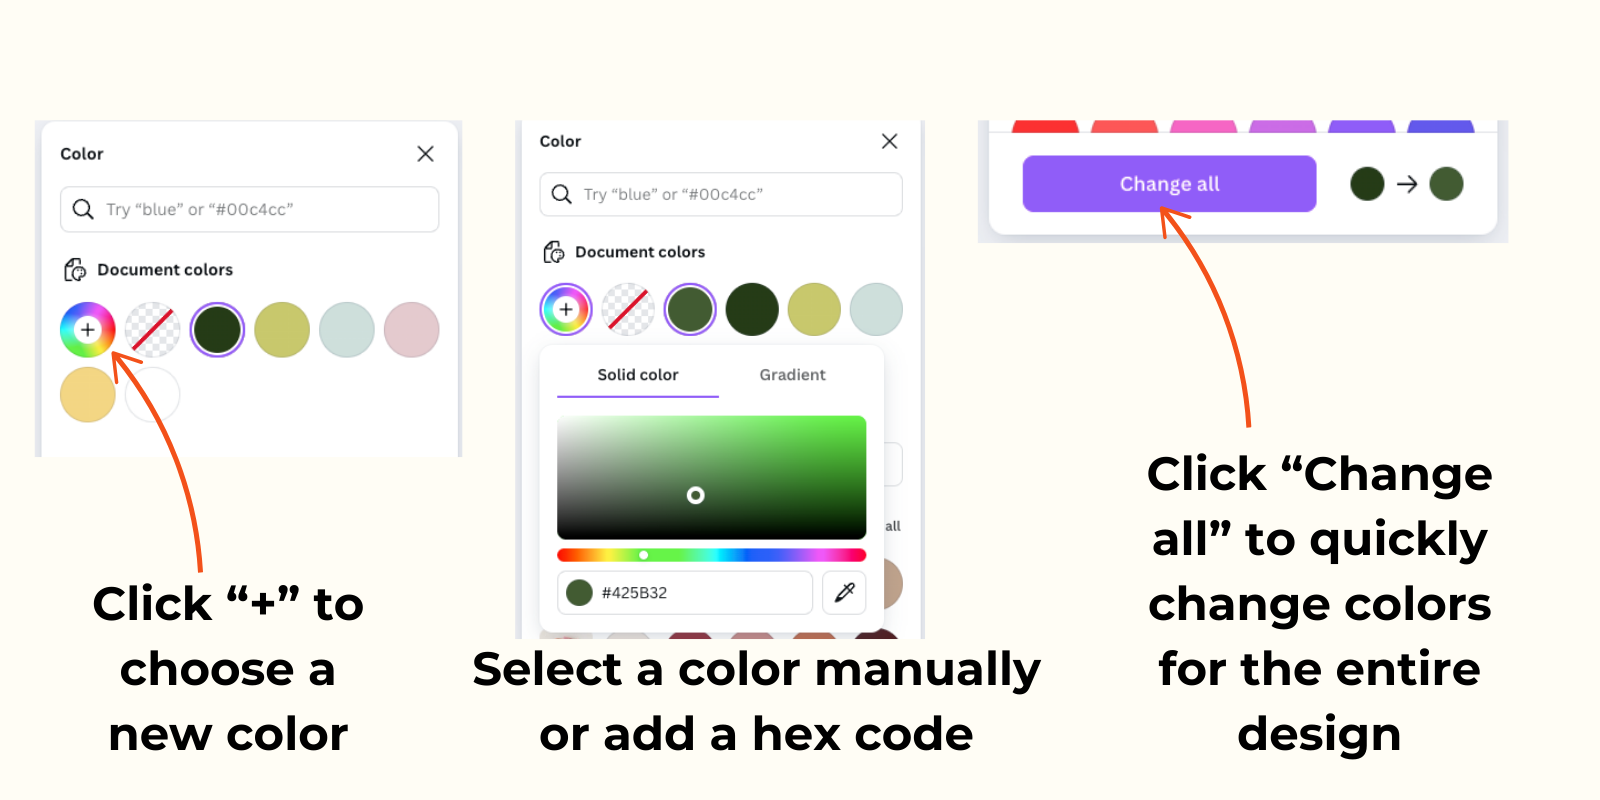
-
Click on any colored element in the template
-
When the color picker appears, click the "+" button
-
Enter your brand's hex code (e.g., #FF5733) or choose a color manually
-
Repeat for all the other elements in the template
Pro tip: Create a brand kit by clicking on "Brand Kit" in the left sidebar (available in Canva Pro). This allows you to save your colors for quick access across all designs.
For backgrounds, click the background of your design and apply your chosen color. For multiple elements that share the same color, use the selection tool to select all similar items, then change the color once to update everything simultaneously.
Pro tip #2: Use Canva’s “Change All” feature to quickly swap one color throughout the template to another color.
Step 2: Customizing Fonts
Typography is another key element of your brand identity. To update fonts:
-
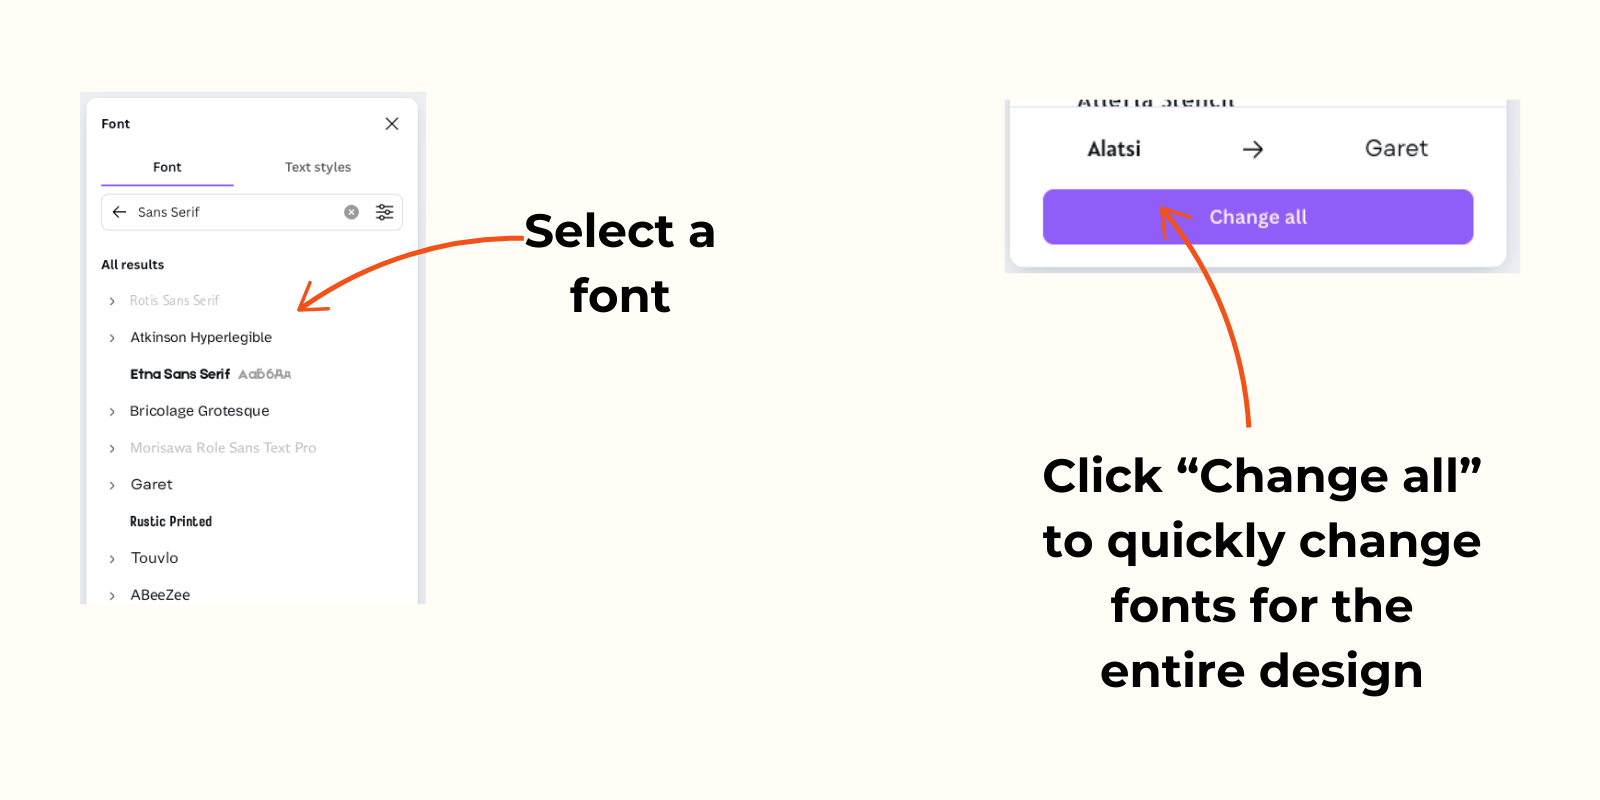
Select any text element in your template
-
Click the font dropdown in the top toolbar
-
Choose from Canva's font library or upload your custom fonts (Canva Pro feature)
-
Adjust size, spacing, and alignment as needed
When customizing fonts, maintain the hierarchy established in the template—headlines should remain prominent, body text should be readable, and calls-to-action should stand out. Stick to 2-3 fonts maximum for a clean, professional look.
Pro tip #2: Use Canva’s “Change All” feature to quickly swap one font throughout the template to another font.
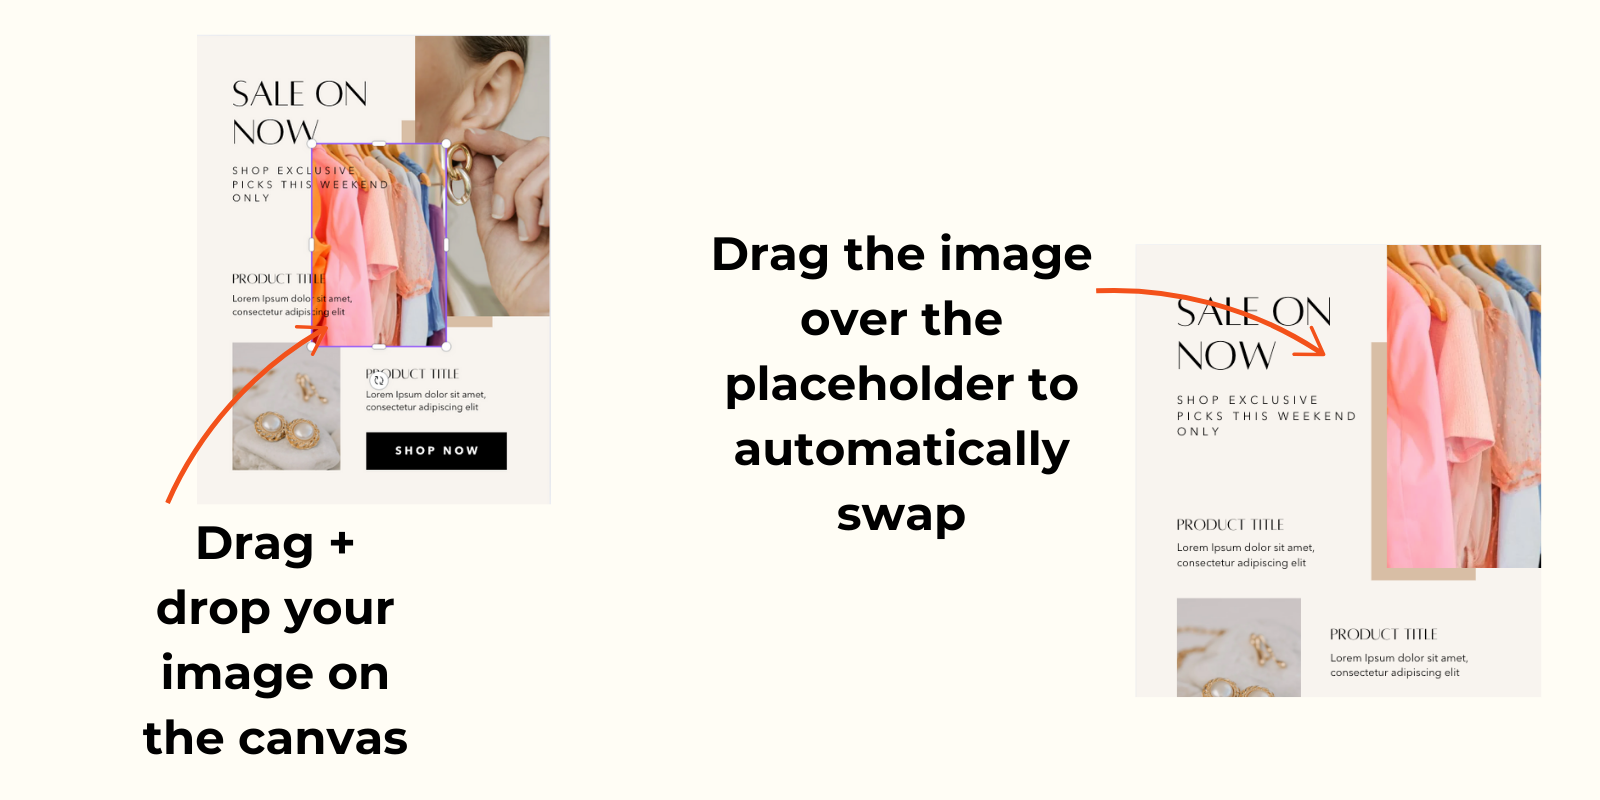
Step 3: Adding Your Images
Personalizing your templates with your own product photos or brand imagery makes them truly yours:
-
Simply drag and drop your image on the canvas
-
Position your image on top of one of the placeholder images and it will automatically swap
-
Double click on the image to adjust the image size and position within the frame
When selecting images, choose high-quality photos that align with your brand aesthetic. Ensure product images are well-lit and show your offerings clearly. For lifestyle images, maintain consistent styling across all your templates.
Use Canva's cropping tool to focus on the most important parts of your images. You can also adjust brightness, contrast, and apply filters to create a cohesive look across different photos.
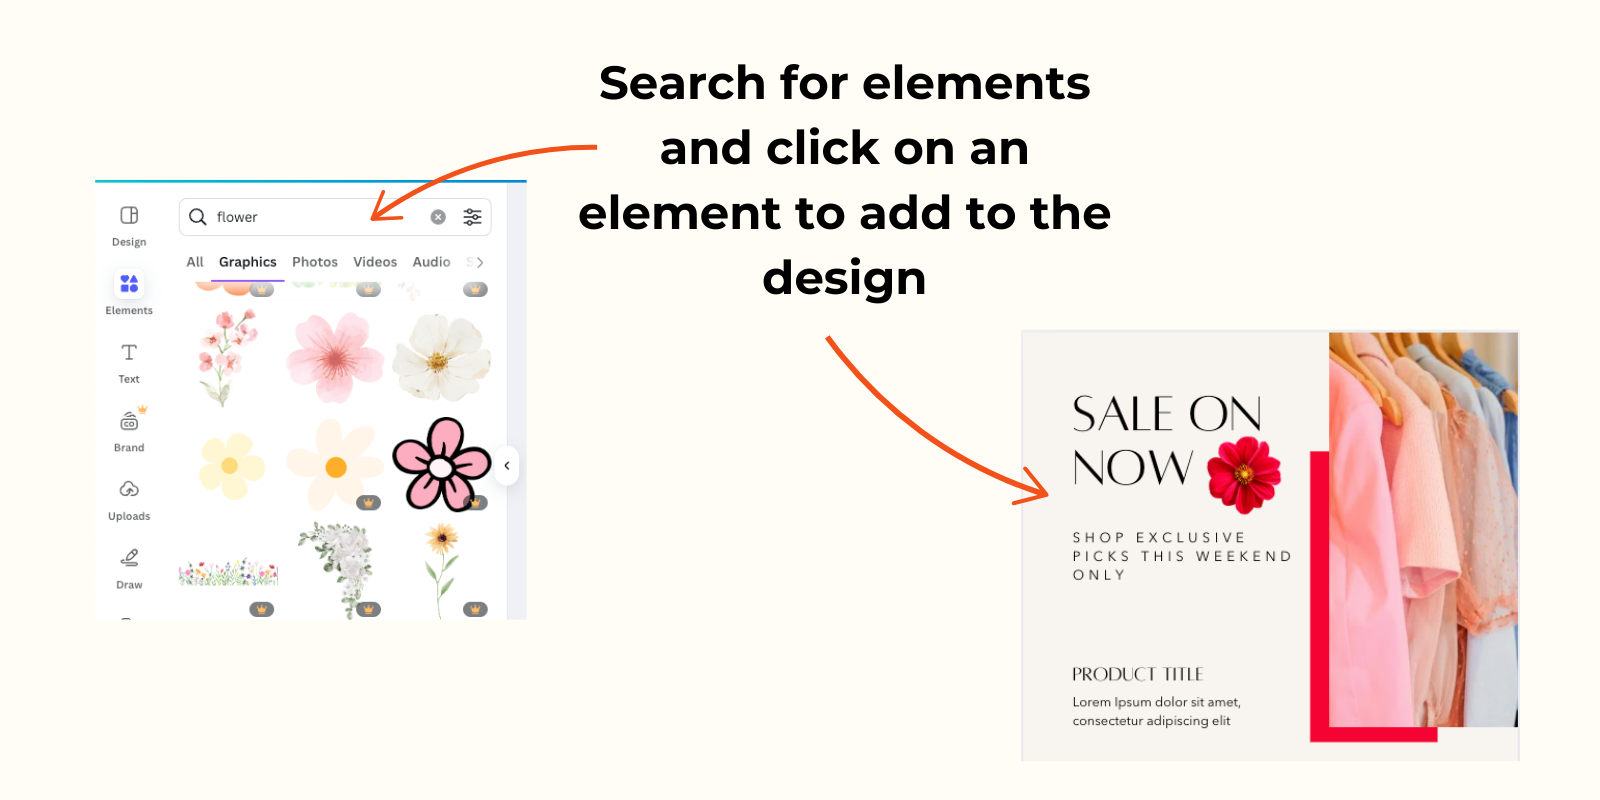
Step 4: Personalizing Graphics and Elements
Beyond colors, fonts, and images, you can customize the graphic elements in your templates:
-
Select any graphic element (icons, shapes, lines, etc.)
-
Use the toolbar to change colors, size, or rotation
-
Delete elements that don't serve your design
-
Add new elements from Canva's library if needed
Don't be afraid to simplify templates by removing decorative elements that don't align with your brand aesthetic. Conversely, you can enhance designs with additional elements from Canva's extensive library—just ensure they complement rather than complicate your layout.
For a cohesive look across multiple templates, use similar styling for graphic elements throughout all your designs.
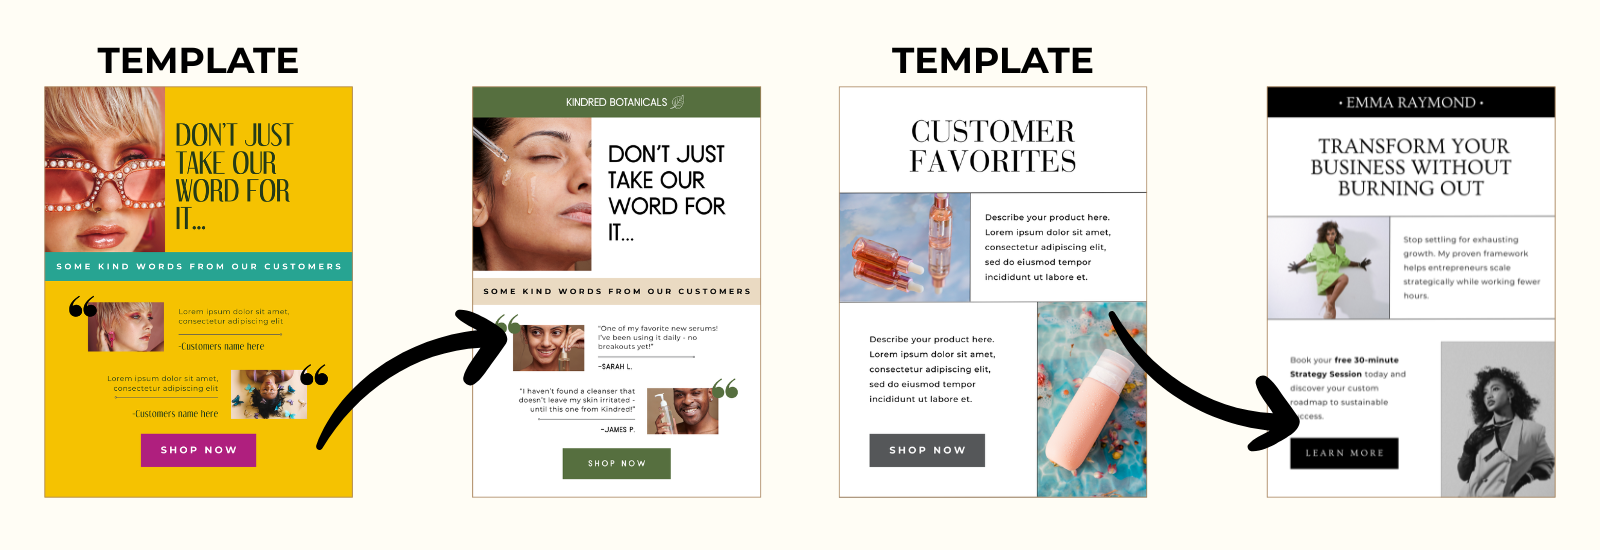
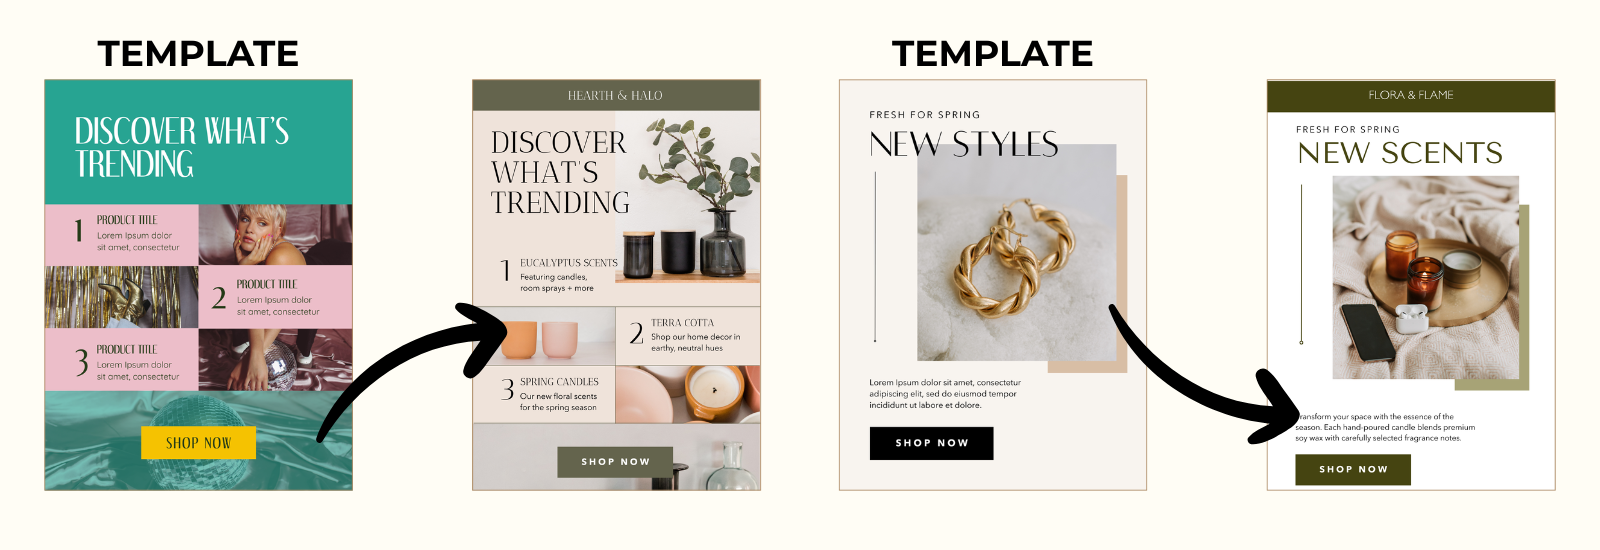
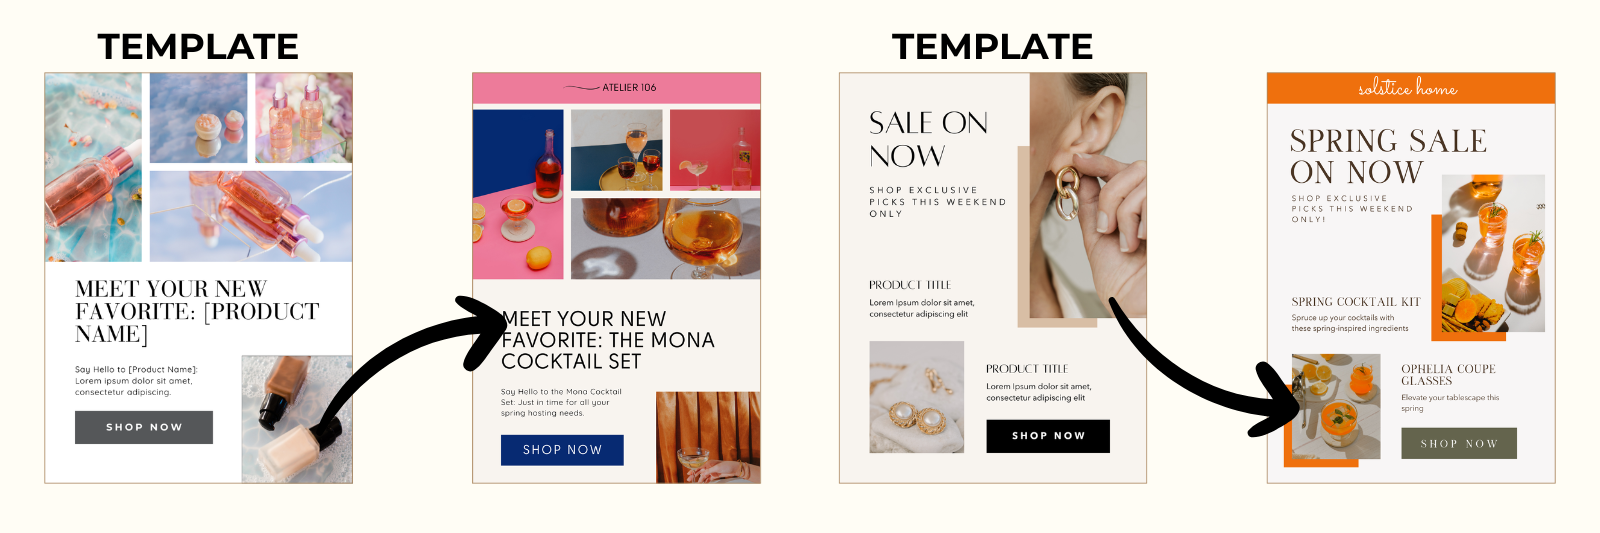
Template Transformations
Check out some beautiful template transformations that are possible with Canva:


Advanced Customization Tips
Once you're comfortable with basic customization, try these advanced techniques:
-
Create template variations: Duplicate your design and make slight modifications for different platforms or purposes
-
Batch editing: Apply the same customizations across multiple designs simultaneously
-
Shortcuts: Learn keyboard shortcuts (like Ctrl+C/Ctrl+V for copy/paste) to speed up your workflow
-
Group elements: Select multiple elements and group them (Ctrl+G) to move or modify them together
Troubleshooting Common Issues
Even experienced Canva users encounter occasional challenges:
-
If elements won't move, check if they're locked or grouped with other elements
-
For sizing problems, hold Shift while resizing to maintain proportions
-
If text looks pixelated, check that you haven't increased it beyond its original size
-
When elements disappear off the page, use Ctrl+Z to undo or check the layers panel
If you encounter persistent issues with our templates, don't hesitate to reach out! We're here to ensure you can easily customize our templates to suit your brand needs.
Customizing templates in Canva doesn't require advanced design skills—just attention to detail and consistency. By following these steps, you can transform professional templates into branded assets that look like they were custom-created for your business.
Remember that consistent branding across all your materials helps build recognition and trust with your audience. Take the time to properly customize each template, and soon you'll have a library of branded assets ready to deploy across all your marketing channels.
Ready to put these customization skills to work? Join Email Clubhouse today!
Transform Your Email Marketing
Join Email Clubhouse to access resources and professionally designed email templates ready to customize and send.
